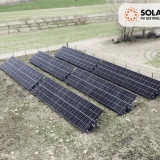
Solar panel optimizer connection and operation: errors and solutions
The efficiency of solar panel systems and the expansion of solar panel systems have played a prominent role in energy efficiency developments in recent years. In order to maximize performance, more and more people are using solar panel optimizers, which help to balance the performance of individual panels, even in the event of shading or different tilt angles. But when and how should an optimizer be installed, and what should you look out for to ensure that the investment really pays off?
In this article, we will show you step by step in which situations it is recommended to retrofit an optimizer, how each type works, and what errors occur most frequently when connecting them yourself. You will receive detailed instructions on how to avoid the most common connection errors and the steps necessary for successful installation.
We also address compatibility issues, pricing, and provide practical advice on installation, handover, and long-term operation of the system. Our goal is to provide transparent and professional assistance to all interested parties, whether you are just starting to build a system or want to increase the efficiency of an existing system.

When is a solar panel optimizer needed to increase performance?
Solar panel optimizers achieve their optimal efficiency when the system operates under environmental or installation conditions where the performance of individual panels may vary. Such problematic situations include partial shading, different panel tilts and orientations, or the mixed use of different panels, but the lifespan of the solar panels can alsoplay a role.
According to data from the NREL (National Renewable Energy Laboratory), partial shading can cause energy losses of up to 10-20% per year in an average residential system. With the use of optimizers, this loss can be reduced by up to 30-40%, as optimizers provide module-level MPPT (Maximum Power Point Tracking). So, for example, if one panel receives less light at certain times due to shading from a tree or chimney, the performance of the other panels will not be reduced with the help of an optimizer.
In addition, if you install panels on a multi-oriented roof surface, for example, with east and west orientations, each section of the system requires a separate MPPT. The optimizer allows each panel to operate at its ideal momentary power point, regardless of the status of neighboring panels. This is particularly important for rural or urban installations where the panels are distributed across the roof at different angles.
In summary, optimizers are recommended when:
1. partial shading is present (trees, chimneys, antennas),
2. the panels are positioned in multiple orientations,
3. you are using mixed types or panels of different ages,
4. your long-term return on investment is important, as the additional energy gained by optimizers can help you recoup your investment more quickly.
Did you install the solar panels yourself? - These are the most common mistakes
Many homeowners think that connecting solar panels is easy for anyone to do, but this can involve serious risks – not only in terms of reduced performance, but also life-threatening situations. Let's look at the most common mistakes:
1. Poor mounting
Incorrect mounting can cause the mounting structure to become unstable, especially in windy conditions.
2. Improper electrical connection and cable use
It is common to use cables that are too thin or not suitable for outdoor use, which can heat up, oxidize, and even overheat due to overload. In addition, DC current is dangerous – improperly prepared output connections can even cause a fire.
3. Failure to comply with permits, safety and regulations
Unlicensed inverters and network connections are illegal according to regulations, which can result in fines or even the dismantling of the system. According to US regulations, a building permit is also required for systems over 50 kVA.
4. Use of cheap, unreliable components
In order to reduce the cost ofpanels, inverters, inverter accessories or mounting structures, many people choose cheaper products with inadequate warranties. This can result in short- and medium-term failures and higher maintenance costs.
5. Lack of maintenance
Failure to perform regular maintenance (e.g., cleaning, checking connections) after the system is installed can result in significant efficiency losses and safety risks.
In short, connecting solar panels yourself can lead to a number of avoidable mistakes, from licensing issues to improper electrical installation. Involving a professional is typically a worthwhile investment to ensure safe, efficient, and proper operation.
Step-by-step retrofitting of a solar panel optimizer
Retrofitting a solar panel optimizer is an excellent way to increase the efficiency of existing systems, especially if the system is already in operation but needs to be optimized.
1. Preparations and compatibility check
First, check that your inverter and panels are compatible with the optimizer. Most manufacturers, such as Huawei, Deye, and Tigo, have a list of supported devices on their websites. The technical documentation also specifies the voltage range and control protocols with which the optimizer works.
2. Power disconnection and safety precautions
It is important to completely disconnect the system from the power supply before connecting it: disconnect the DC side (panels) and the AC side (mains). It is advisable to use personal protective equipment (gloves, safety goggles) and to observe fire safety regulations.
3. Placement of optimizers
The optimizer must be connected directly between the panel and the inverter or distribution box. Make sure that it is placed in a suitable temperature environment (not exposed to direct sunlight or rain) and that the cables are sized according to the manufacturer's recommendations.
4. Connecting DC and communication cables
The DC cables (positive and negative) connect from the panel to the optimizer, to each other, and finally to the inverter. If the optimizer supports application connection, a data connection must be added via a USB or RS485 serial line so that the system can monitor the performance. If the optimizer can be connected to a monitoring application, it can communicate via the power transfer cable in some cases, but in other cases a separately powered data logger is required.
5. System reconnection and function check
After switching on, first check the voltage and current on the DC side. The system should not trigger any alarms – you will see the MPPT channel data on the inverter display. It is advisable to use a monitoring application to check that the optimizers are working and that there is an actual increase in performance.
Steps for connecting the Huawei optimizer to a solar panel
For Huawei SUN2000 series optimizers, such as the 450 W or 600 W models, it is essential to follow the installation steps to ensure safe and efficient operation. Here is a detailed guide:
1. Compatibility and preparation
Check compatibility: Huawei optimizers only work with supported inverters, and each string must consist of the same number of modules and optimizers.
Plan the cabling – do not exceed a communication distance of 350 m to the inverter.
2. Physical installation
Mounting:
For extruded aluminum profiles, use T-washers, threads, and screws.
For modules, use frame configuration screws (bolt assembly) or mounting brackets, all of which are provided by Huawei or an external supplier.
Heat dissipation:
Ensure sufficient air space between the housing and the module so that the optimizer can operate stably at max. 70°C.
3. Connecting the DC cabling
Connect the IN input of the optimizer to the connector on the panels and the OUT output to the string continuing to the inverter. It is important not to connect them in reverse, as this may damage the device.
Use a multimeter for measurement: the output resistance of the optimizer is ~1 kΩ, and on average 1 kΩ × number of optimizers per string.
4. Starting and configuring the system
Turn the inverter back on, then run the "Optimizer Search" function inthe FusionSolar app or WebUI so that the system can recognize the optimizers.
Create a physical layout document – stick the SN labels on the attached diagram, take a photo, and upload it via the app or WebUI.
5. Live operation check and testing
Check the status of the optimizers:
Green: working
Gray: offline
Red: error
Yellow: connection interrupted.
Common errors: input overvoltage (> 80 V), overheating, incorrect cabling – these can be monitored inthe Maintenance menu and, if necessary, the optimizer can be replaced.
Steps for connecting the Deye solar panel system optimizer
The SUN-XL02-A optimizer is an excellent choice for increasing the efficiency of existing solar panel systems – energy production can be increased by 5–25% even in partial shade. The installation process is detailed below:
1. Safety precautions
-
Disconnect the system from the power supply: first switch off the AC side, then the DC side. The connection must only be carried out by qualified personnel using standard outdoor cables and appropriate protective equipment.
2. Physical mounting
-
Place the optimizer directly at the bottom of the panel, on the MC4 connector – ensure sufficient ventilation for stable operation up to 85°C. Use suitable mounting brackets or connection wedges for the panel frame – the Deye manual contains precise mounting instructions.
3. DC connection
-
The positive and negative outputs of the panel are connected to the IN input of the optimizer , and the OUT is connected to the string inverter. Correct polarity is essential – reverse connection can cause damage to the device.
4. Communication and monitoring
-
Connection to the Deye cloud is possible using B series optimizers with a separate power supply unit.
5. Testing and activation
-
Switch the inverter back on (AC side), then the DC section – wait 5–10 minutes for the residual charge to discharge until you no longer hear any alarms, indicating that the system has safely come to life.
What should you know during practical use?
-
The optimizer has a DC capacity of 700 W and a conversion efficiency of 99.5%. With an IP68 protection rating and an operating range of -40 to +85 °C, it is extremely durable. Real-time monitoring of the device helps to detect faults early, for example if the optimizer is offline or not connected.
Steps for connecting the Tigo solar panel optimizer
The TS4 optimizer family, such as the TS4-A-O or TS4-R-O models, provides module-level MPPT and Rapid Shutdown functionality. The following detailed step-by-step guide will help you with professional retrofitting:
1. Preparations and compatibility check
-
Make sure that the selected Tigo model is suitable for the panels and inverter. For example, the TS4-A-O is suitable for optimization, while the TS4-S only offers monitoring and Rapid Shutdown functions. If you need not only optimization but also monitoring and safety shutdown (Rapid Shutdown), you will need to install TAP (Access Point) and CCA (Cloud Connect Advanced).
2. Physical mounting on the panel
-
The TS4 modules should be placed on the back of the panel, in the upper corner of the frame, with the cable connectors facing downwards. This ensures proper drainage and heat dissipation. Do not drill additional holes and leave at least a few millimeters of free space between the panel and the TS4 for cooling.
3. DC cabling and connection sequence
-
First , connect the input DC cable connectorsfrom the panel to the input side of the TS4, then continue with the TS4 output connection to the next TS4 or string. The correct order is critical: input → output → next TS4. This will prevent damage to the device.
4. Setting up the TAP and CCA communication system
-
The TAP communicates with the TS4s via a wireless connection with a range of approx. 10 m. The TAP must then be connected via a cable to the CCA, which must be located near the inverter and have an internet connection for system monitoring. One CCA can handle up to 7 TAPs and 900 TS4 modules.
5. System startup and commissioning
-
After installation , create a paper-based system map, stick the barcodes of the TS4 modules on it, and then assign them to the CCA in the Tigo EI app or web interface. Check the communication status based on the TAP indicator lights (green – OK, flashing – searching, red – error).
6. Monitoring and activating Rapid Shutdown
-
After commissioning the system, check remotely – via the Tigo EI or web interface – that all module data is displayed and that the optimizers are in theON state.In the event of Rapid Shutdown, the TS4 systems will shut down within 30 seconds in response to a signal generated by the CCA or inverter, and all DC output voltages will drop to < 30 V.
Compatibility and pricing: solar inverter and optimizer price
Before retrofitting optimizers, it is essential to assess system compatibility and costs:
Compatibility
Optimizers are tested by the manufacturer with the inverter and the voltage range of the panels; this is the only way to guarantee proper operation.For example, Huawei optimizers can only be used with Huawei inverters; while Tigo and Deye are generally compatible with a wide range of string inverters and hybrid systems.Some manufacturers, such as SolarEdge with its universal models (P370i), work with multiple inverters, which is ideal if you are planning to change inverters.
Price
Deye SUN‑XL02‑A optimizers can be ordered from the SOLARKIT webshop (B2B interface), with prices available only after registration.According to external sources, for example, a SolarEdge P370i universal optimizer costs ~€84, while other models (P300–P700) range from €49 to €68. TheTS4-A-O model costs around £39-40 (~€45), and the required TAP+CCA unit costs ~£252 (~€285).
Return
The optimizer can increase production by up to 5–30% in shaded conditions, allowing for a faster return on investment.
It is important to consider the maximum rated power of the inverter: if the inverter capacity is fully utilized before expansion, a new inverter may be required, which also affects the optimizers.
SOLARKIT recommends that the price and durability of the inverter are critical factors; often, the optimal decision is to design the inverter and optimizer together.
SOLARKIT tips for efficient installation and maximum solar panel performance
SOLARKIT experts often emphasize the importance of the correct tilt angle (around 35°) and leaving at least 5 cm offree airflow at the back of the panels to help cool them – this is especially important in hot summer weather to reduce heat build-up. A clean, contamination-free panel surface is also crucial – washing off dust and leaves can increase performance by up to 5–10%.
During the on-site survey in preparation for installation, it is worth taking into account future shading elements (e.g. vegetation, chimneys, antennas), as partial shading can reduce the system's performance by up to 20% – the optimisation system helps to compensate for this.
It is advisable to use panels of the same type and power rating, as differences between mismatched panels can reduce efficiency by up to 10%.
What should you pay attention to when handing over the solar system and optimizer?
The most important thing during handover is detailed documentation and a demonstration of the system functions. SOLARKIT recommends that the optimizer string (TS4 module, TAP/CCA, Huawei optimizers) for each panel be shown in the installation drawings and that these labels also be registered on the monitoring interface.
Make sure that the monitoring application shows the individual performance of the panels and that an error or offline status is indicated. For systems with a Rapid Shutdown function, such as Tigo, it is important that the system switches off within 30 seconds after the CCA/Wi-Fi stick is switched on if a shutdown command is issued.
Request warranty and operating documents—such as a manufacturer's warranty for optimizers and inverters, typically 10–25 years—and check that they include maintenance recommendations, contact information, and operating thresholds (e.g., voltage, temperature, current values).